Monday, September 24, 2012

September 12 Lab

The goals for this lab were to cover:
  • Subculturing 
  • Aspergillus cultures
  • Riddell mounts
  • Hyphal growth
  • Media Variants
For subculturing, you want to select the appropriate media (more on this later) and under sterile conditions, transfer a small section of previously plated fungus on to the new media. This is a pretty simple procedure, and this will be necessary when isolating fungi for our unknowns.

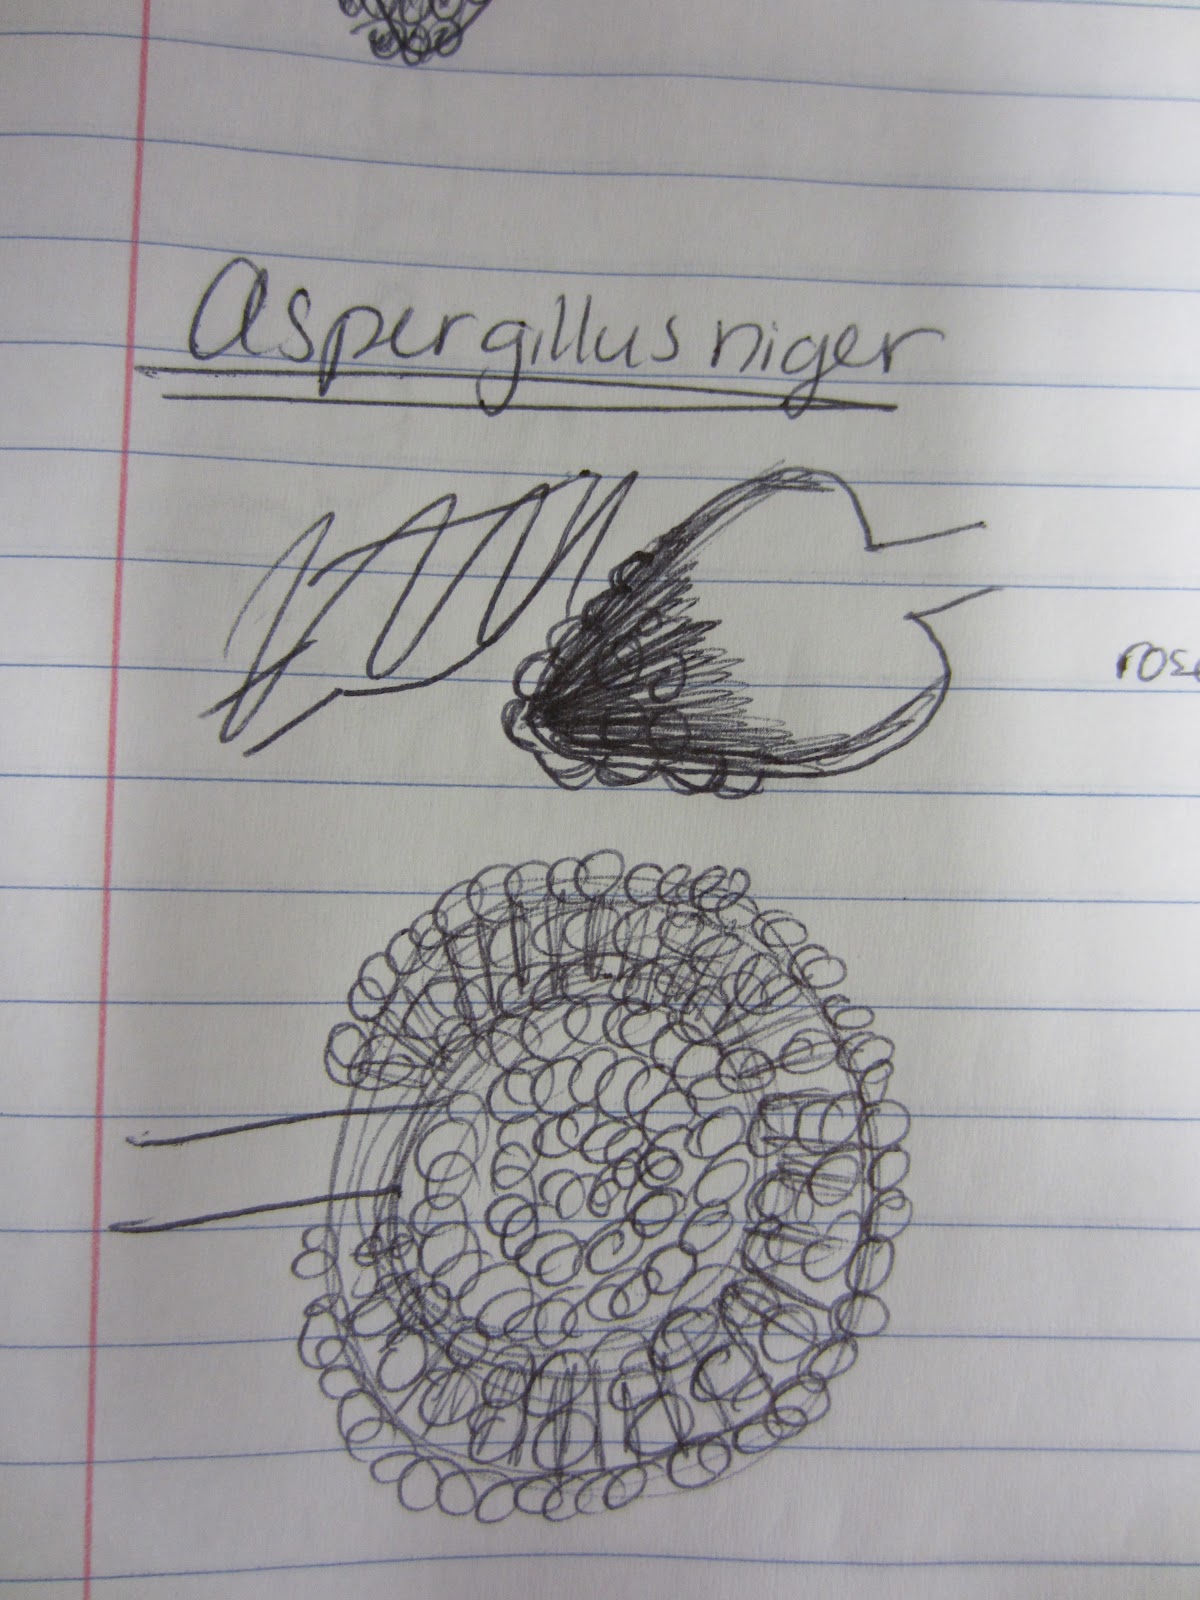
We also looked at a number of Aspergillus species to see if we could tell the difference in fungi of similar structure. This group has simple, round spores that make identification difficult unless the intact conidiophore is viewed. This turned out to be fairly difficult for me to tell the difference, but I think as I get better at preparing slides to look at my specimens, this will become easier. Here are some drawings of the various samples we looked at.
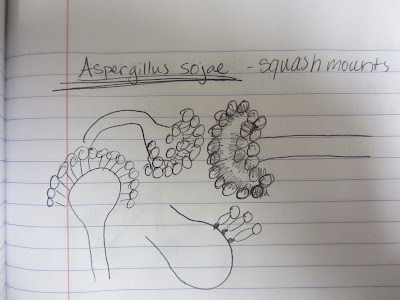
Aspergillus sojae, squash mount.

Aspergillus flavus (atoxigenic strain), squash mount

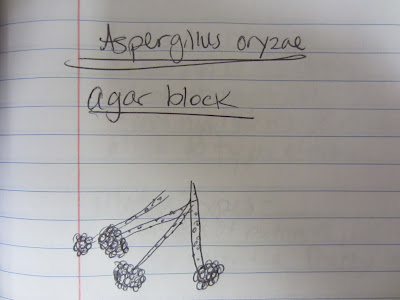
Aspergillus oryzae, agar block.

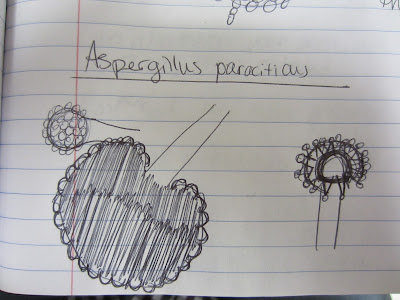
Aspergillus paraciticus, squash mount.

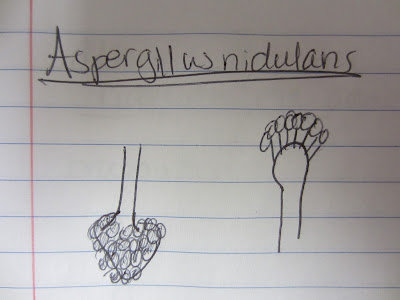
Aspergillus nidulans, squash mount

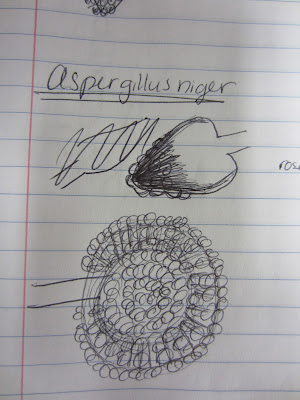
Aspergillus niger, squash mount

Aspergillus tamari,  squash mount


     The Riddell mount is another technique we learned in the quest to better view conidiophores. The classical version of this technique is to place a cut piece of agar on to a microscope slide that will be placed in a clean petri dish on top of a bent glass rod. The glass rod elevates the slide so that water can be added to the petri dish to avoid letting the agar dry out. From here, the fungus in question will be transfered to the sides of the cut agar block, and then a cover slip will be placed on top of this agar block. After a few days, as the fungus begins to grow, some growth should come in contact with the cover slip. This cover slip can then be transfered to a new, clean slide with a drop of water and be viewed under the scope. It is ideal to make several of these mounts that can be viewed over the course of a few days to catch the optimal stage in growth for viewing. There is a modified version to these mounts that requires less supplies and time. Simply take a clean agar plate, cut a few blocks from the edge, and then place these blocks on the side of the plate that has uncut agar. This method will help to  keep moisture in the agar block.

     Finally, we also learned about various types of media that we can use to grow our various fungi with. The best media may be different for each fungus and the use of several types may be necessary to find the right media to properly grow a particular fungus. More on the various types of media can be found here:

http://classes.midlandstech.com/carterp/Courses/bio225/chap12/fungalculturemedia.htm


Thursday, September 13, 2012

Lab 1...A bit late

     I didn't get a chance to post about last week's lab (September 5) but I will go ahead and talk about it now. After going through everyone's blogs, we covered setting the proper Kohler illumination on our compound microscopes to better view specimens. Proper set-up will help to achieve clear, contrasting images that are evenly lit. 

    We also got a chance to practice making squash mounts and tape mounts of Thielaviopsis brassicola, Cladosporium, Aspergillus niger, Alternaria brassicicola, and Pythium ultimum

    Before reviewing these two mount techniques, let's first cover how we are maintaining a sterile field. Let's also assume for any subsequent work, unless stated otherwise, working in a sterile field will refer to this technique. Simply begin by setting up and lighting a Bunsen burner on a level surface. Convection produced from the flame will keep any petri dishes in close proximity to the base of the burner in a clean field. When opening a petri dish, be sure to open towards the flame, to avoid any possible contamination from breathing on the plate. Also, be sure to pass any tools that will come in contact with the agar, petri dish, or fungus, through the flame for a few seconds to sterilize them before use.   
Convection created by the flame will keep your petri dish in a clean environment. Photo taken from http://www.stbedes.ngfl.ac.uk/curriculum/science/microbi.htm
Squash mount: In a sterile field, place a drop of sterile water on a glass slide. Using a scalpel, probe or loop, retrieve a small mass of fungus from a previously inoculated plate. If agar is collected with this sample, try to keep it to a minimum to make it easier to view the finished mount. The sample should be placed in the water droplet on the slide, and a clean cover slip should be placed over the center of the sample. Using the flat end of your probe, gently press down on the cover slip to flatten and even the sample to better view under the scope. This technique takes some practice and is greatly dependent on the particular fungus. Thankfully I will get lots of practice with this method this semester and should get better with time.


     Tape mount: This method (if you get good enough at it) can be used to see conidiophores that may be damaged or otherwise not visible in a squash mount. Basically you take a small piece of tape and very gently touch the tape to the plated fungus. This tape can then be placed on to a drop of water on a clean slide. No cover slip is necessary for viewing under the microscope. While I was able to see different structures with this method, I still prefer the squash mount. 
An example of a squash mount. Clearly I still need practice with this method. 

   Use of the Hemocytometer for counting cells was taught during this lab as well. I have used this technique before when making spore solutions to inoculate cotton seeds with fungal endophytes. The basic gist is to take an aliquot of spore solution and place them on to a specialized gridded slide that aides in counting the number of cells per square on the grid. You can then do the math to figure out how many cells you have per volume in your solution. Using a particular dye you can also determine which cells are alive and which are dead.
This is an example of what the entire grid on the hemocytometer  looks like. The  circled squares are where my lab tend to take counts from.
    I didn't take any pictures from the microscope of the fungi we looked at, but I was able to draw some representative pictures...

Thielaviopsis brassicola squash and tape mounts. Both techniques let me see similar structures.  
Cladosporium sp. squash mount and tape mount drawings. I was able to see more structures with the tape mount that I could not capture with my squash mount.
Aspergillus niger squash and tape mounts. I was only able to see spore chains in my tape mount.
Alternaria brassicola squash mount only. The conidia were easily seen with this method.
Pythium ultimum squash mount. There were a lot of unknown structures, but we believe that the thin-walled cells are young oogonium and the thick-walled are developing cells after fertilization.